When you start a new project, you have to choose the tools for it. On the one hand, this can be very satisfying. On the other hand, it can cause a disaster before you even start developing a production version. Working on the frontend layer may seem like an abstract concept to backend developers. Fortunately, thanks to the developments in this area in recent years, you can successfully begin your startup and give it full support with both the visuals and server-side code.
In this article, I’ll tell you how you can make your frontend work easier using the Nuxt.js framework.
Nuxt.js is a framework based on Vue.js that enables you to create apps based on the SPA (Single Page Application) model, SSR (Server Side Rendering) model, or static html files.
Vue.js is a JavaScript framework for user interface design.
Both frameworks are MIT-licensed, so you can legally modify them and use them for commercial projects.
Changes on “the front”
When I was a beginner website and web app designer, visual design was mostly about knowing HTML, CSS, and any editing software (like Photoshop) really well to create a website template that you could then “cut” into PNG files with readymade tools and the “select” function, and then use those PNG files in your code. This required a bit of artistic prowess, the use of imagination, as well as knowing some CSS tricks to properly place graphic elements in front (in those times, the PNG format with its transparency was not as popular or globally supported by all browsers).
With the technological advances and progress in this field, there are many solutions that can make your work on visuals a lot easier. However, that does not mean you don’t need to have some artistic sense.
Unless you are facing a challenge to create a completely new brand or visual identity, including graphic designs that require artistic skills, creating a good-looking website mostly comes down to adhering to established conventions and using readymade mechanisms/modules, and introducing standards and developing UI/UX implies, to some extent, creating a user-friendly, easy-to-use website.
Nuxt.js is one of the tools that can make your work on frontend easier with a minimal entry threshold. With this tool, you can get satisfying and impressive results, mostly through integration with numerous libraries for graphical interface design.
Strengths of Nuxt.js
- SSR support — you can write code that will work both on the server side and the client side, which is vitally important for SEO.
- Static website model support — you can create a blank website in html for all your programmed routing rules.
- Low entry threshold.
- Components are all contained in a single file and clearly separated into structures like template (<template>), styles—including preprocessors like Less, Sass (<style>)—and JavaScript code—including preprocessors like TypeScript (<script>).
- Built-in support and configuration for many graphical interface libraries.
- Structured build — you don’t have to wonder where an element should be in the directory tree.
- Full routing support, multiple languages, access control, middleware, etc.
- Full support of ES6/ES7/ES8 — you don’t need to learn all the ins and outs of tools like Webpack or Babel. You also don’t have to worry whether or not your code will work in all browsers.
- Real-time code changes and process reloading without developer involvement (hot code reloading).
- App code analyser — clearly shows the impact of every module on the size of output css/js code.
Use case - a frontend project in Nuxt.js
In my opinion, the best way to learn about new technologies is by looking at their use cases. To start a frontend project in Nuxt.js, I will use a code that could represent a real startup. At the same time, I don’t want this tutorial to just retrace the steps you can find in official documentation. Some of its elements will be strongly geared to realising a project based on my experience.
For practical purposes, you must first establish certain project assumptions:
- The frontend is designed for an app that serves as a database and knowledge base for various drink recipes
- The frontend communicates with an external API
- The frontend supports multiple languages
- The frontend provides a user authorisation mechanism
- The frontend is adapted for mobile devices

Let’s begin! Creating a frontend project with Nuxt.js step by step
To create a new frontend project in Nuxt.js, you simply execute a single npx command (assuming you have installed Node.js and npm):

When you start a new project, you will be asked to add the following to the new instance:
- Project name, description, and author.
- The language you will use to write the code — JavaScript or TypeScript.
- The packet manager for Node.js you will use. I definitely use npm more often, but yarn is faster.
- The graphical interface library. You can choose from several popular options. Personally, I would recommend Vuetify. It’s heavily based on Material Design, the graphical style by Google.
- The library that will handle requests on the server side. Out of the available options, Express is the most popular solution—and that’s what I’ll use in this tutorial.
- Additional libraries (e.g. Axios, used for submitting http(s) requests, or DotEnv, used to manage app configurations in accordance with the rules of a 12 factor app).
- The code quality control tools and test library integration tools.
- Finally, the frontend rendering method. As I previously mentioned, there are three mechanisms to choose from. You have to pick SSR or SPA during project setup. A static website can be generated with either model, at any point.
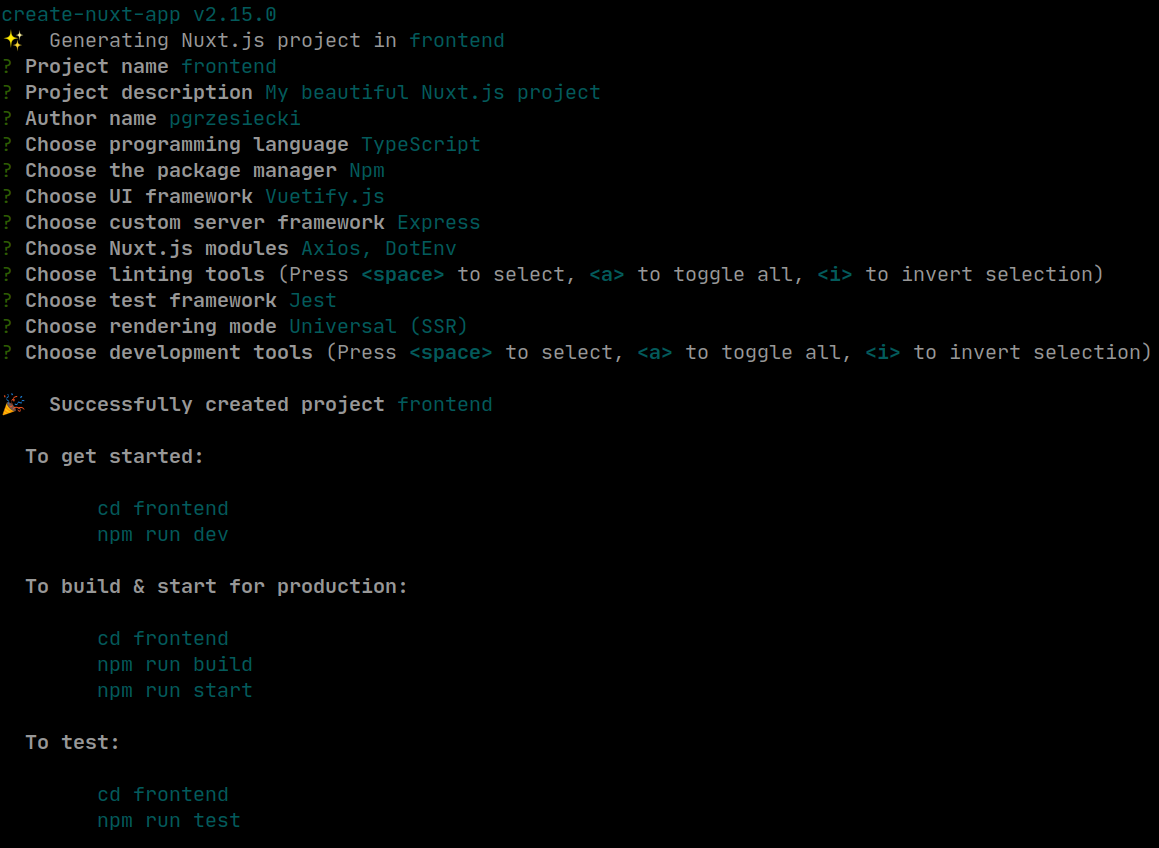
Fig. 1. New Nuxt.js-based app config.
After configuring your frontend, you need to run it:

and check the result in a web browser by opening http://localhost:3000
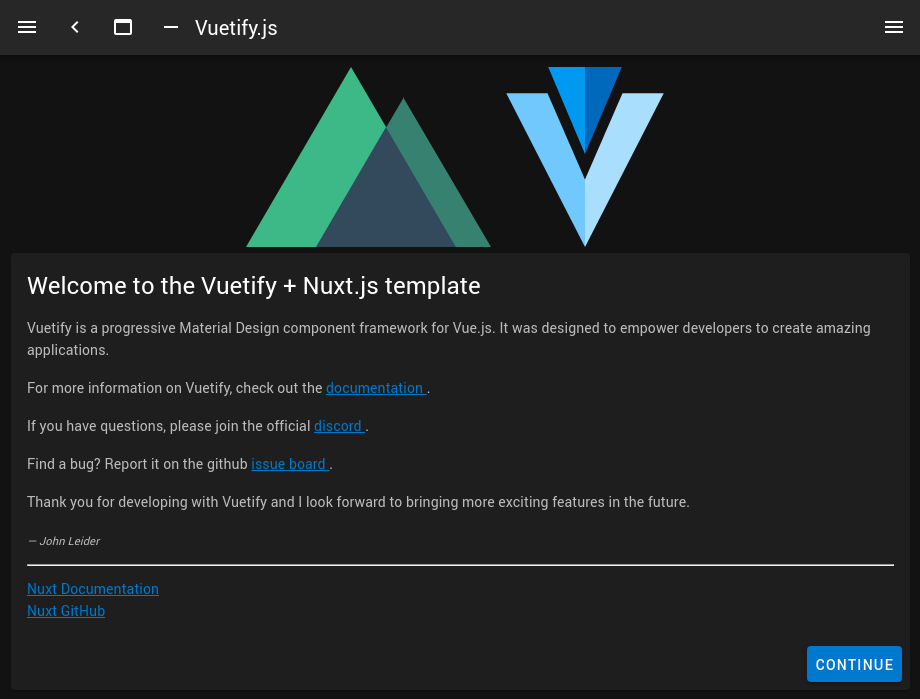
What’s where — Nuxt.js app structure
Adapting the structure to our needs
The structure of the project is very simple and easy to master even for those new to creating frontends using Nuxt.js. However, in my opinion it is a good idea to make organising directories even easier by separating the majority of the code used for creating the target app and moving it to the src folder. To do that, create the src folder in the main directory and move the following folders and files there:
- assets
- components
- layouts
- middleware
- pages
- plugins
- static
- store
- .env
You can do that using a simple command:
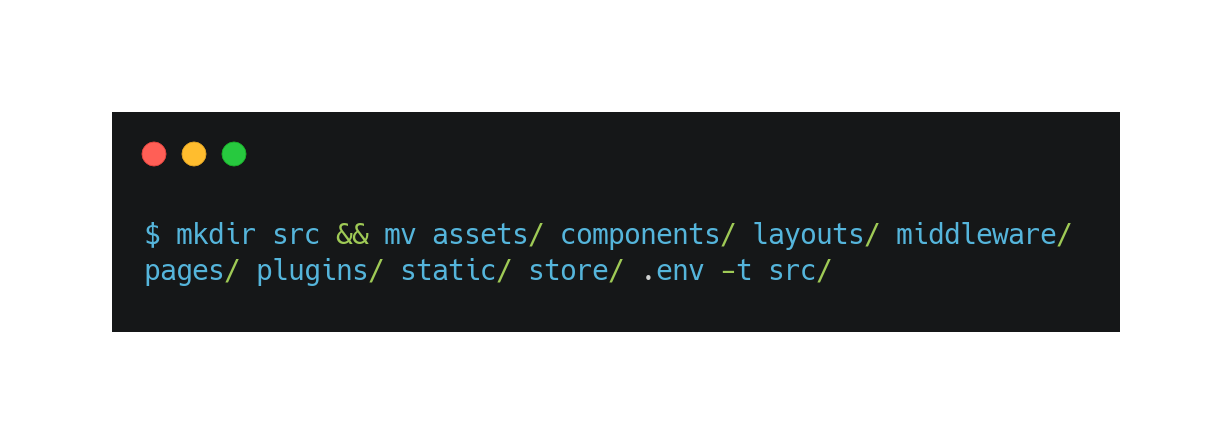
Once the directories are moved, you need to change the Nuxt.js configuration so that it can correctly read all the dependencies.
I won’t talk in length about the configuration of Nuxt.js as it is presented in a quite succinct manner on the official page of the project, and I will focus on the components that are important for our application.
In the nuxt.config.json configuration file, you need to add the following entry:
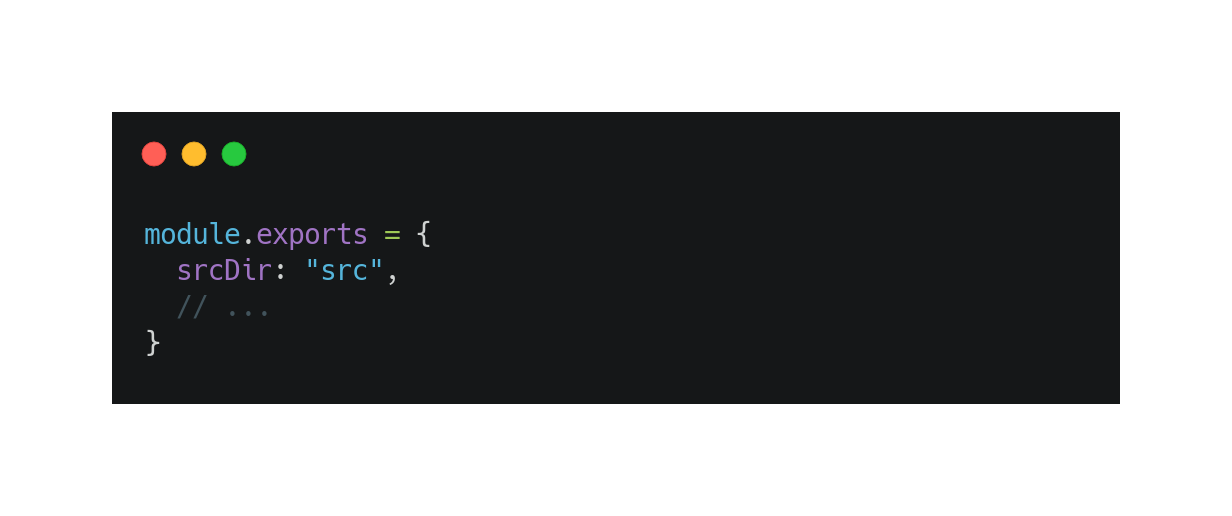
Besides the directory containing the source code of your application, you can also customise several other components connected with the structure:
- rootDir — main directory containing the project (by defaults, it is process.cwd()).
- srcDir — a folder containing the source code of your application (by default, it is rootDir).
- buildDir — a directory used for storing the transpiled code.
- dir — an object containing the names of the directories for each component of the Nuxt.js application in case somebody tries to change the default location or name (e.g. for the middleware folder that has been moved to the src directory).
As you can see, there are multiple configuration options for the structure.
Application structure after changes
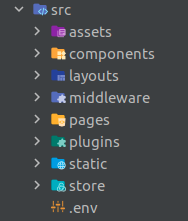
While separating your directories with the source code from everything else, you may want to know what can be found in each of them:
- assets — a place to store unprocessed files, such as e.g. less or sass. Nuxt.js supports multiple different preprocessors, and this is the place to store their sources in.
- components — a folder containing the operational foundation of Vue.js, i.e. all your reusable components.
- layouts and pages — this is where you can find all the main templates of your frontend. Every routed page is stored in the pages directory and uses the main template. These templates are mainly used for standardising certain components of the frontend for multiple pages, so that each subpage can have a unified header, footer, or menu.
- middleware and plugins — as the names suggest, these are locations to store the code that impacts the operation of your application by expanding or adding certain mechanisms, or by modifying its behaviour.
- server — here, you can find the code that is executed on the server’s side. In this case, it is the configuration of the Express server instance.
- static — a place for storing all the static files (js, css, img, fonts, etc.). Importantly, all the files from this directory are automatically shared publicly. For instance, an application icon from the static/favicon.ico file can be viewed using the http://localhost/favicon.ico address.
- store — a place where the code with logic containing different application statuses is kept. You can picture this as a global register that can be accessed and read or modified by particular components of your frontend during the “lifetime” of your application in order to mutually share certain information.
- nuxt.config.js — the main configuration file of the Nuxt.js application.
- .env — a configuration file of your application
With a project prepared in such a way, you can easily start your adventure with backend developers’ nightmare, i.e. creating views and the graphical interface.
How does it work? Why even diehard backend engineers can succeed using Nuxt.js? All this and more can be found in the next episodes of the Frontend for backend developers: an introduction to Nuxt.js series.


