

When building apps for use with connected vehicles, Smartcar is an attractive choice. Why? It’s a standardized API that works across multiple car brands and models, simplifying the development process and reducing the need to create separate integrations for different vehicle manufacturers.
However, even though the Smartcar API offers support for many platforms (including React, Node or Native iOS and Android), it doesn’t have an official support for React Native (there’s no dedicated SDK). That means a workaround is required to resolve this problem and allow you to benefit from the advantages of Smartcar API.
In this article, we explain step-by-step how to overcome this issue, so that you can build your app in React Native and enjoy the advantages of Smartcar API.
What is Smartcar API?
The Smartcar API is a platform that allows developers to interact with vehicles directly via their apps. It’s a popular tool because of a number of advantages it brings:
- Through this API, developers can build applications that interact with 43 vehicle brands, without worrying about the specific protocols or systems used by different manufacturers.
- It does offer SDKs for various programming languages and platforms, making it easier for developers to integrate vehicle connectivity into their apps.
- The platform is designed with security in mind, adhering to industry standards and regulations, which is crucial when dealing with sensitive vehicle data.
- Smartcar implements a user-friendly authorization flow, ensuring that vehicle owners maintain control over their data and can easily grant or revoke access to third-party applications.
- The platform provides real-time access to various vehicle data points, such as location, fuel level, odometer reading, and more, enabling developers to create responsive and up-to-date applications.
The React Native framework allows you to build mobile apps for iOS and Android Platforms. By connecting Smartcar API, you can create apps that can connect with vehicles and manage their data.
Key data provided by Smartcar
- Vehicle Information: basic details like make, model, and year. Retrieve the air pressure for each tire, confirm a car’s VIN.
- Location: tracking of a vehicle’s location by geographic coordinates.
- Battery and fuel data: battery capacity, remaining battery charge or fuel level updates.
- Vehicle controls: lock/unlock doors, start/stop the engine, adjust the charge limit, and remotely manage charging.
- Charging status: users can be notified when their vehicle has finished charging or monitor the charging process remotely. This feature is also helpful for managing charging station usage.
Getting started - creating an account with Smartcar API
To begin, you have to sign up for the service via Smartcar developer account.
Once your account is created, start a new application from the Smartcar dashboard. That application will serve as the connection between your mobile app and the API.
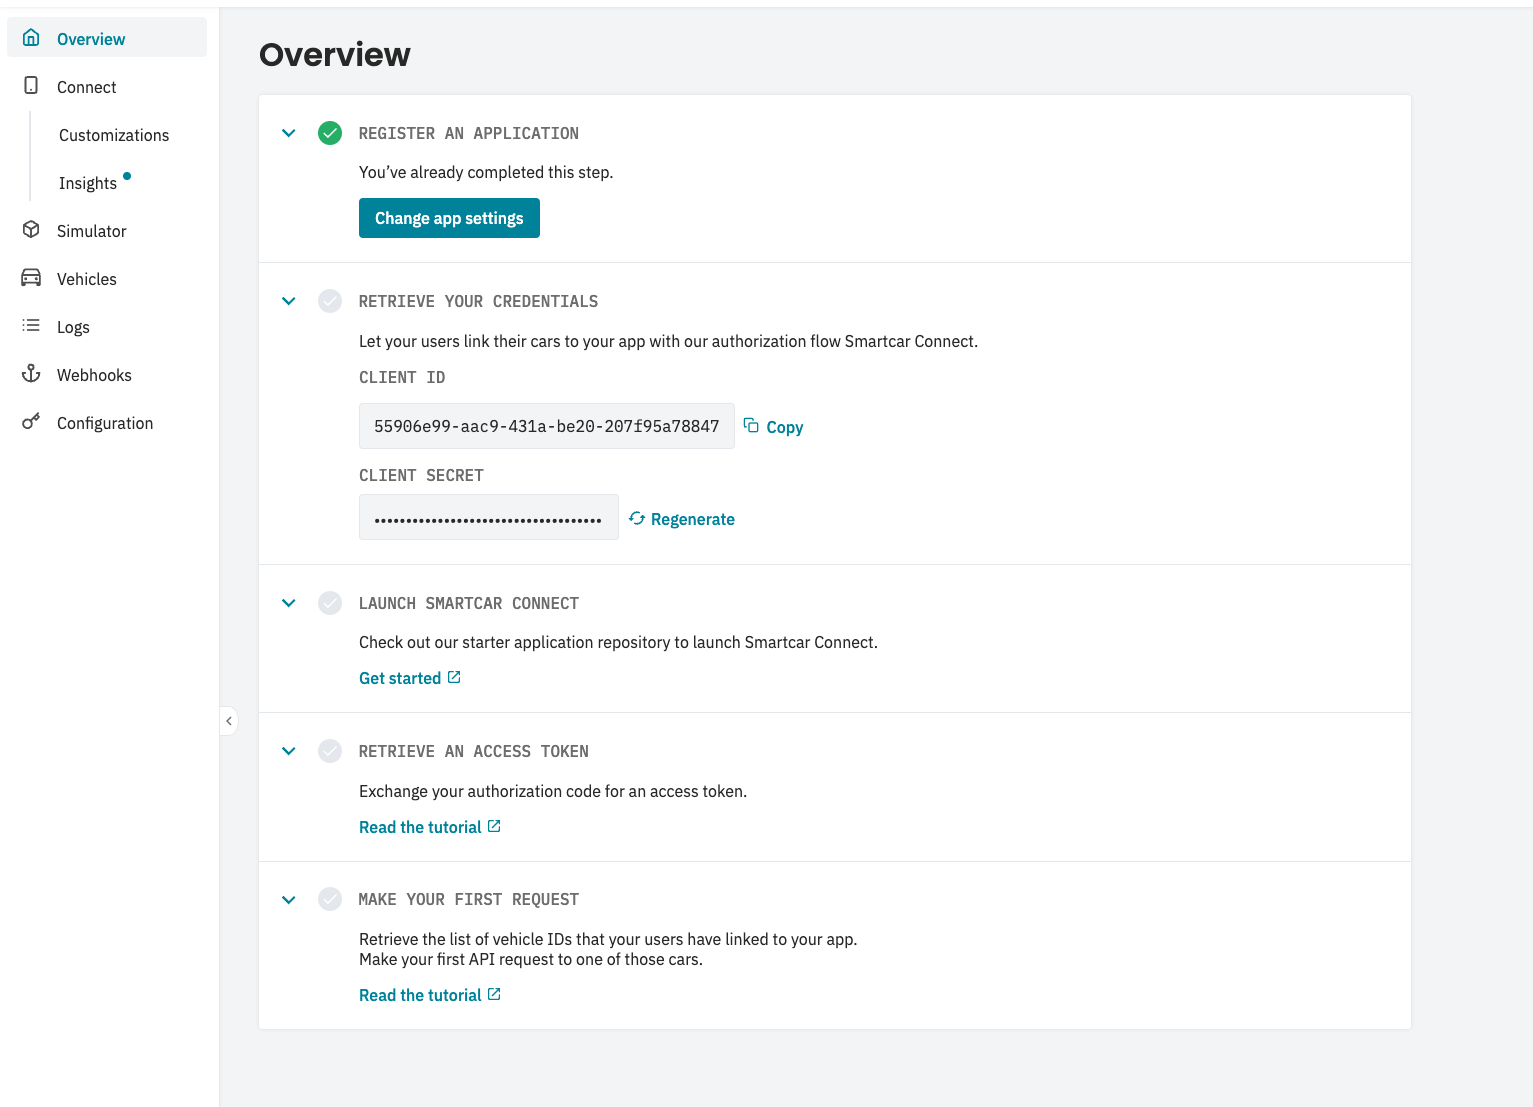
Having set up your new Smartcar app, you’ll see a client ID and client secret. You’ll have to use these credentials to authenticate application requests to the Smartcar API.
Connecting your React Native app with Smartcar API - a step-by-step process
Since Smartcar does not provide an official SDK for React Native, we will have to implement Smartcar Connect using the react-native-inappbrowser-reborn library, which provides a way to handle OAuth flows in a secure in-app browser.
Here's what’s involved:
Step 1: Install the required libraries
You'll need react-native-inappbrowser-reborn to handle the in-app browser functionality. First, install the package yarn add react-native-inappbrowser-reborn and then query-string to extract query parameters from a URL yarn add query-string
Step 2: Configure Smartcar OAuth flow
Step 3: Set up Redirect URI
You need to configure your Smartcar app to use a redirect URI that can handle the OAuth callback. Typically, you might use a custom URL scheme or a universal link. For this example, we'll assume a custom URL scheme.
- Custom URL Scheme: Set up a custom URL scheme (e.g., myapp://callback).
- Add Redirect URI to Smartcar: Go to your Smartcar Developer Dashboard and add your custom redirect URI (e.g., myapp://callback) to your application's redirect URIs.
Step 4: Prepare OAuth URL
You need to generate the authorization URL to start the OAuth flow:
Step 5: Open the OAuth URL
In your React Native app, use react-native-in-app-browser to open the Smartcar OAuth URL:
Step 6: Handle the OAuth Callback URL
The URL will be opened when Smartcar redirects back to your app:
Step 7: Exchange code for token
After obtaining the authorization code, you need to exchange it for an access token. This should be done on your backend server to keep your client_secret secure. Your backend will handle the token exchange and can send the access token back to your app.
Here’s a basic example of how you might implement the token exchange on a Node.js server:
Step 8: Handle the Access Token in your app
Once you receive the access token from your backend, you can use it to make authenticated requests to Smartcar's API to access vehicle data.
Ensure you test the OAuth flow properly, including handling edge cases such as token expiration and refresh.
By following these steps, you can integrate Smartcar Connect into your React Native app using an in-app browser for OAuth authentication. This setup provides a secure and user-friendly way to authenticate users and access vehicle data.
Best practice
There may be a case when a user updates their details in their car account. When this happens, the user will need to go through Smartcar Connect again to update their authorization via Smartcar. More information can be found here.
Need more help with connecting your React Native app to connected vehicles?
In case you have any questions about this process or run into issues with your React Native app development, feel free to write to us at hi@rst.software contact form and we’ll be happy to help!


