The best developers are lazy! You’ve probably heard this one before. It’s laziness that inspires us to find the easiest and most efficient solutions. But this drive to achieve the same results with less effort is not exclusive to software developers. We all appreciate lifehacks that make things easier for us. One of those enhancements is voice control for apps. It lets you execute actions as you’re driving or whenever you’re too tired to type.
For some time now, browsers have had experimental APIs that let you create your own voice assistant. I think that’s a very cool addition to any website. However, you have to remember that this functionality is currently available in Chrome and Edge and requires Internet access.
If you’d like to see how a finished assistant works before you get to coding, you are welcome to test my own app Scan-food, that already has a web voice assistant.
Prepare the SpeechRecognition class

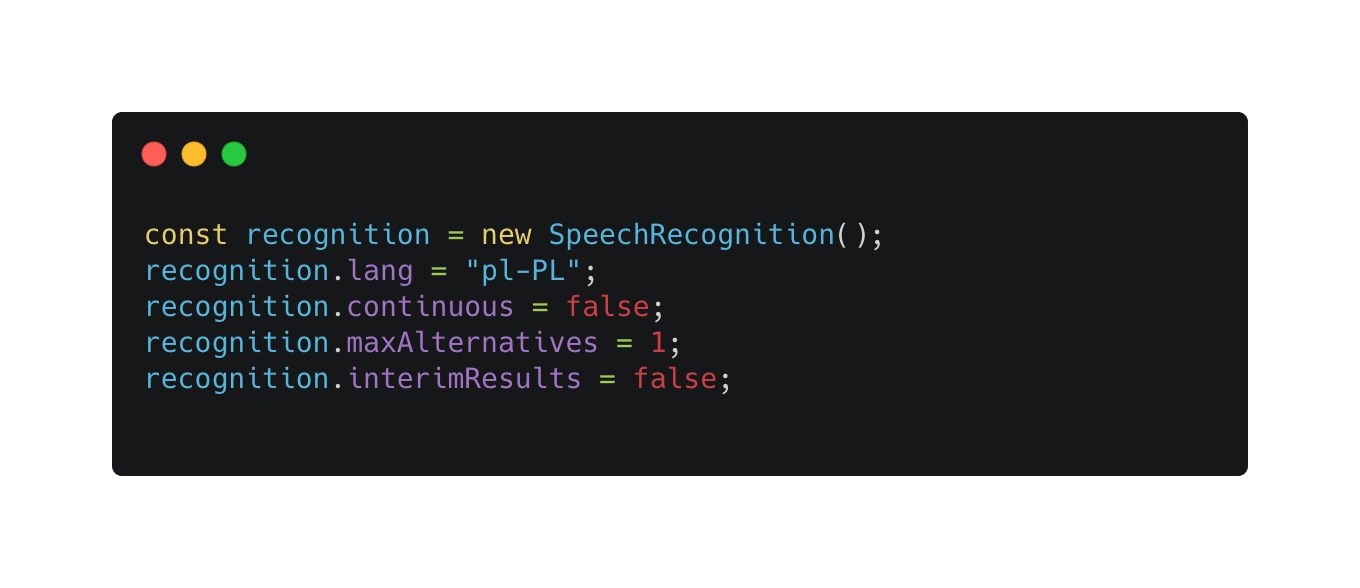
To create your assistant, you’ll need two classes: SpeechSynthesis that reads submitted text and SpeechRecognition that recognizes speech. In this article, I’ll focus on the SpeechRecognition class. Let’s start with basic class settings. Take a look at this piece of code:

Speech recognition settings
The above settings can really change how speech recognition is used. Let’s talk about them in order.
- The first setting is language. It’s not a required setting since the browser will attempt to detect user’s language. The language included in the <html> tag is used by default. However, if you dynamically change website language, you should input it manually in SpeechRecognition settings.
- The next setting, “continuous” is responsible for continuous speech recognition in a loop. If you set it to “true”, you will have to manually pause speech recognition using “stop” or “abort”. When creating a voice assistant that will talk to the user, it’s best to set this flag to “false”. Otherwise, the assistant’s speech will get recognized, but the user’s speech won’t.
- maxAlternatives is an interesting option. I recommend raising it to at least two. This option ensures you’ll get more probable results and different entries for the same value. In my test, when I said “Add two thousand grams”, thanks to maxAlternatives I got the following results: “add 2000 g” and “add 2 thousand grams”. Speech recognition handles unit abbreviations and numbers really well. Every recognised result has set accuracy probability, which makes choosing the right alternatives easier.
- Finally, let’s talk about interimResults. When you set that value to “true”, you will get partial recognitions. This is useful when you want to display a portion of recognised words to the user before the final result is interpreted.
- You can also include “grammars” in settings. I didn’t notice any difference when I added them. Keep in mind, however, that this is subjective. Testing this functionality is actually quite difficult. You can’t upload your own audio files when speech recognition is active to compare its efficiency.
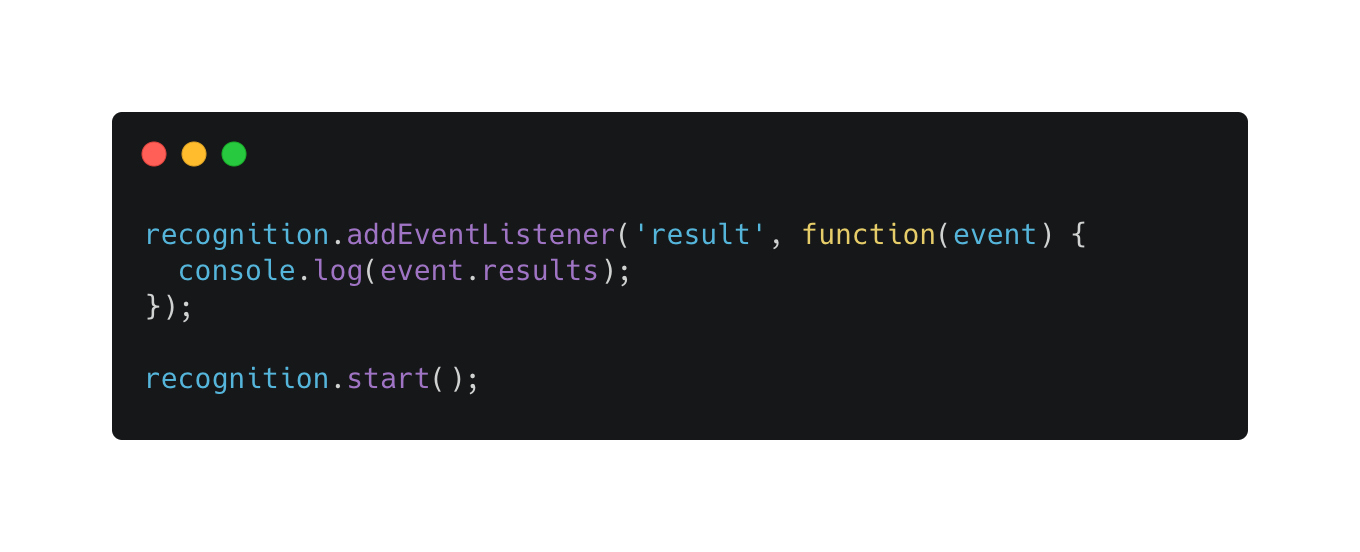
Once you’re all set up, all you have to do is capture some results. Those results are reported by a rather robust event system. The most important event for you is “result”. That event is triggered every time you receive processed data. If you set interimResults to “true”, you’ll get information about partially recognised data mid-speech in the same event.

You did it! This short code returns strings with user’s spoken words. To execute your assistant, all you have to do is set up your own system that will match phrases with execution of specific actions in the system.
I hope this information will inspire you to make your own voice assistant. How often do you use speech recognition on your devices? Let us know in the comments!


